Users, Rights
Users’ access
Only admins can edit the access rights, personal details and rights of users (colleagues) on the Settings [1.1.] > Users page [1.2.].
Users who are not admins can only access their own Profile.
Users are divided into 2 groups:
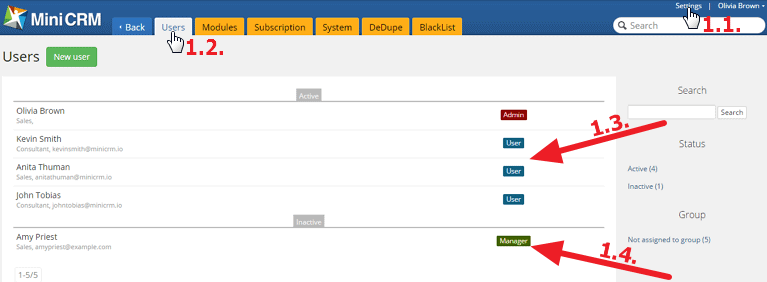
Active users [1.3.]
They have access to MiniCRM.
Inactive users [1.4.]
They cannot log in the system and no fee is charged for them.
Activating and inactivating
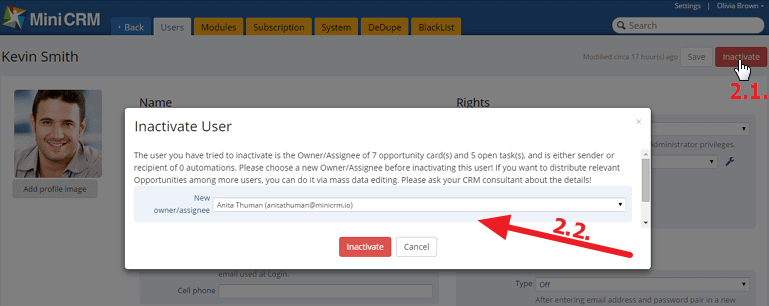
To inactivate a user, click on the user’s name as an admin, then on the [Inactivate] button [2.1.]. It is not possible to reactivate them for 1 week.
If the user is set as owner of cards, task assignee, or is a direct sender/recipient of follow-up sequences, or is present on form fields, the system asks who should be set instead of the user in question [2.2.].
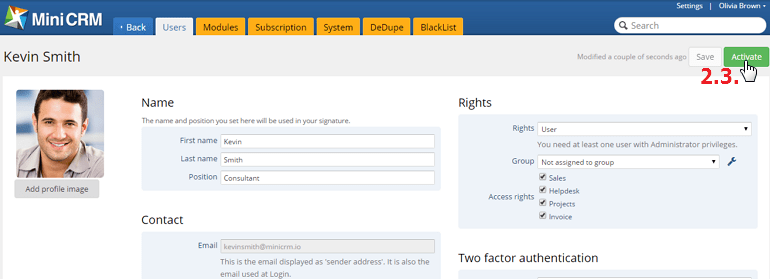
To activate a user, click on the [Activate] button [2.3.].
Adding new users
Admins can add new users by clicking on the [New user] button [3.1.].
Fill out the fields and click on [Add] [3.2.]. You can add more users simultaneously [3.3.].
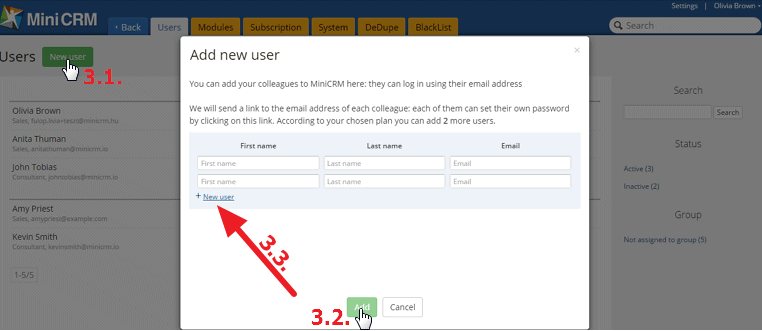
After adding a user, MiniCRM automatically sends an activation email containing a link to your colleague.
The password can be entered after clicking on the link. This email address and password can be used later for logging into MiniCRM.
New users are added as a (normal) User to the system. To change the rights and add further personal details, click on a user’s name.
Name and position
The name and position set here is displayed in the user’s email signature [4.1.].

Managing rights
You can set the users’ access rights to modules [5.1.] and the level of rights [5.2.].
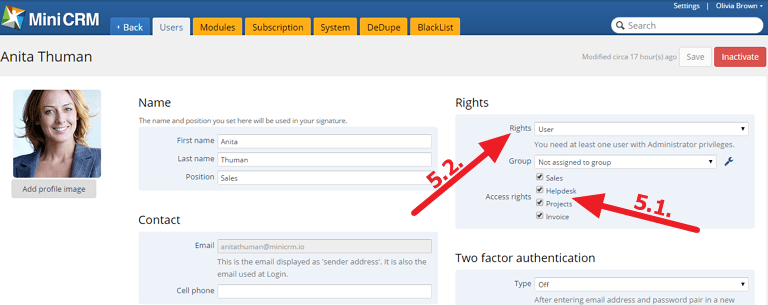
1. User rights
The level of rights can be divided into 4 groups:
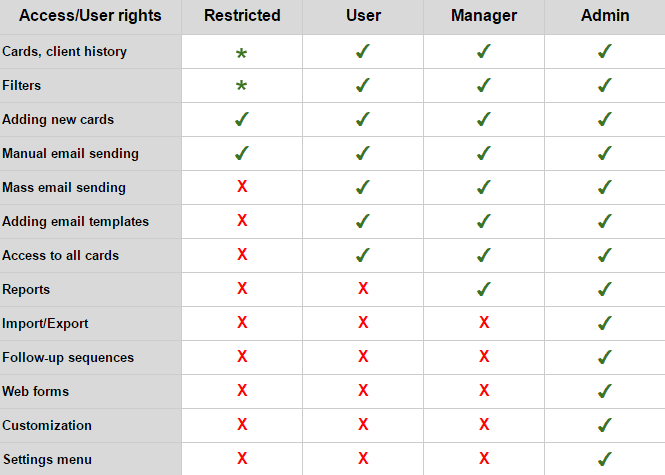
*Only applies to the cards that belong to the user or on which there is an open task assigned to them.
Admin
Admins see all data and have access to every function. It is required to set at least one admin in the system.
Manager
Managers see all data but don’t have access to system settings and follow-up sequences. They can also see reports so it is useful for those who want to see statistics and want to supervise the activity of colleagues.
User
Users can see each other’s clients, tasks and histories.
Restricted
People with restricted rights only see cards that are added to them or on which there are tasks assigned to them. They can only search for cards added to them; however, users with higher rights can also see their cards.
2. Restricted to group rights
It is possible to create groups to which you can add users with “restricted to group” rights.
It is useful if more than one sales team is working separately in one branch because they can see the data of clients belonging to their group but cannot see clients belonging to another group.
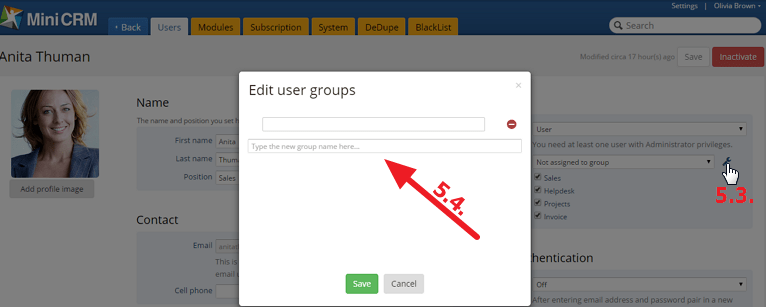
To create groups, click on the Wrench icon [5.3.] next to the “Group” field.
You can edit groups in the popup window [5.4.].
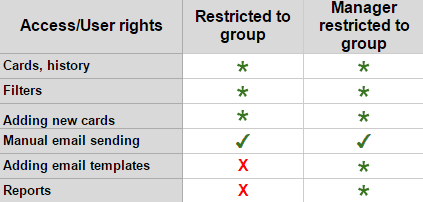
*Can only access data belonging to their group.
Manager restricted to group
Users with these rigths only see the cards of those users who are in the same group irrespective of the other users’ rights.
They also have access to the reports of the group.
Restricted to group
Users with these rigths only see the cards of those users who are in the same group irrespective of the other users’ rights.
Adding “non-group” users
It is possible to add users who are not assigned to a group so the members of the group can see every card of the user whose rights remain the same.
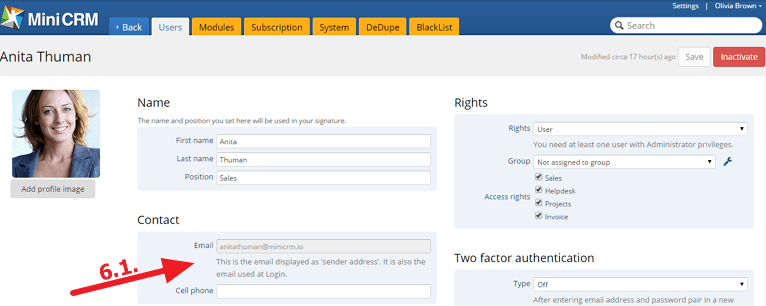
Email and cell phone
If you send an Email/SMS message from the system, clients see the address entered/phone number activated here. If the Two factor authentication is on, the email or SMS message containing the verification code is also sent to this address or phone number [6.1.].
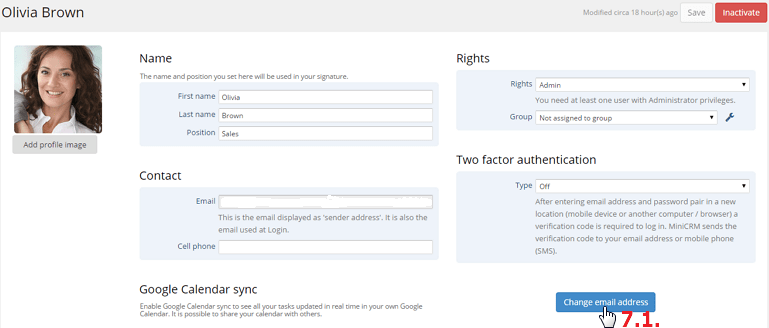
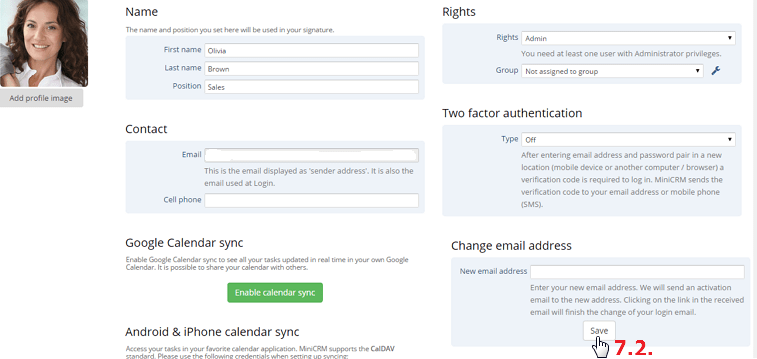
Change email address
To enter a new email address, click on the [Change email address] button [7.1.], type the new address into the field, then click on [Save] [7.2.]. The system sends an activation email to the given address to make the change final.
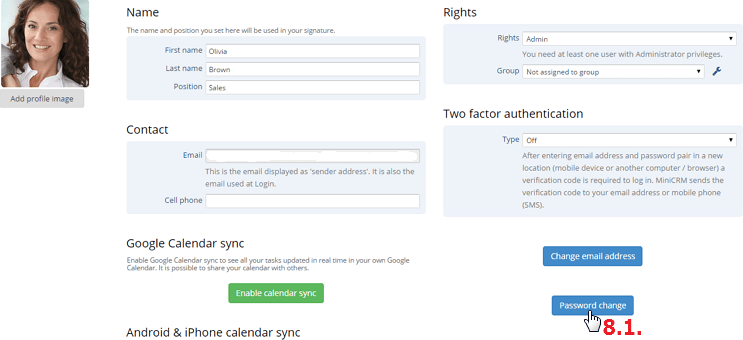
Change password
To add a new password, click on the [Password change] button [8.1.] then type the old and new passwords and click on [Save] [8.2.].
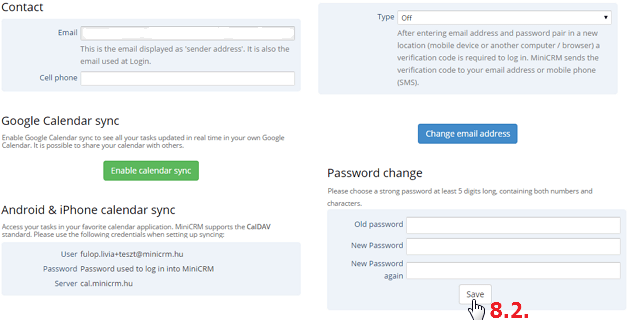
After 3 unsuccessful logins, MiniCRM disables the IP and email address for 15 minutes.
If you forgot your password, click on the Forgot your password? link on the login page or on the following link: https://r3.minicrm.io/Auth/ForgotPassword. After that, enter your email address to which we’ll send an email message containing a link. If you click on the link, you can enter your new password.
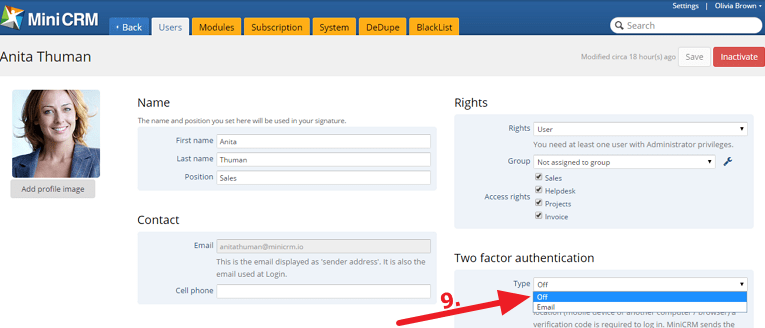
Two factor authentication
If you log in from another mobile phone/computer/browser for the first time, you have to enter a verification code after entering the email address and password. At Two factor authentication > Type field [9] you can set how you want to receive the code.
SMS option can be only selected if you have previously activated SMS sending on your Profile at Contact.
For more information, see: SMS Sending
You have to enter the code within 5 minutes after entering the email address and password. If you don’t enter it within 5 minutes, you have to request a new one.
Email signature
You can set the content and appearance of your signature that is displayed in emails sent out from the system. You can choose from two options [10.]:
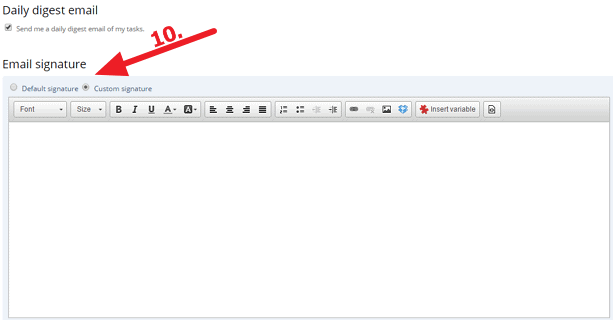
Default signature
If you select this option, the signature template of the selected module will be used. The signature is equal to the system language and is arranged based on the following:
First name Last name
Position
Phone number: …
Email: …
The arrangement of the central signature cannot be changed.
To insert the signature into a message, use the Sender: Email signature variable.
Custom signature
You can create a custom signature template on the editor that appears. To insert the signature into a message, use the Sender: Email signature variable.
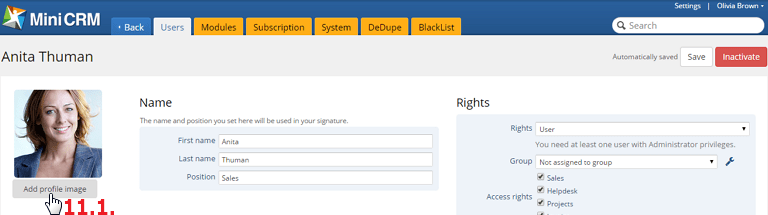
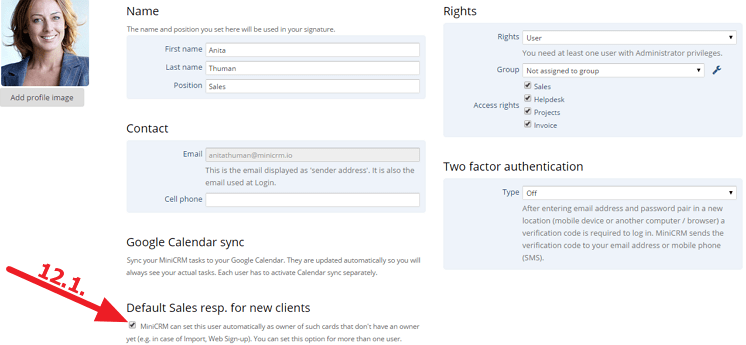
Adding profile image
To add a new image, click on the [Add profile image] button [11.1.]. As an admin you can upload images to other users as well.
New contact person
MiniCRM automatically adds an Owner to cards recorded via forms.
The owner is selected from those active users, who checked the Default Sales resp. for new clients option [12.1.]. If no one checked this option, the system name (as an inactive user) is shown as owner. That name was given when the system was created.
Cards, that are not added to any users, are accessible to all users.
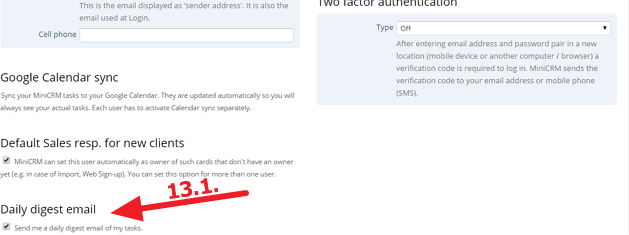
Task notifications
If you check the Daily digest email [13.1.] option, the system sends you an email about your current tasks every morning.
“(Company) data shown in pictures were only created for testing.”