Adding New Clients, Cards
Within different modules, information and tasks related to your clients are stored on cards. More cards can be added to the same client.
Adding manually
To add a new card to a client that already exists in the system or to a new one, click on the [New…] button [1.1.] within the selected Module.
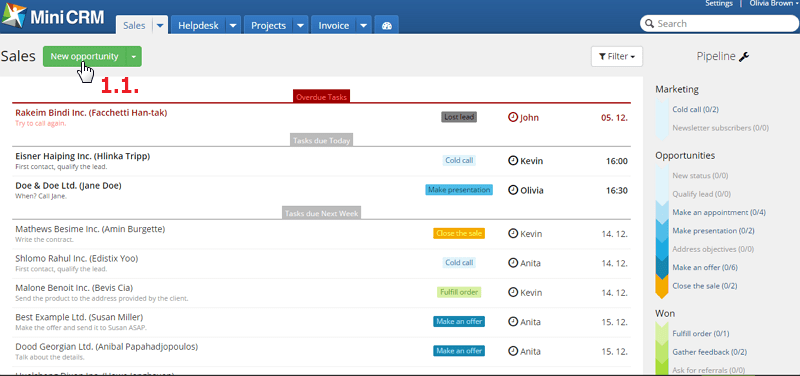
If you search for a name (company/person) but the item cannot be found, you can add a card to a new client by clicking on the [New card] button [1.2.] and selecting an option.

If you add a card to a new client, the first step is to enter information about the contact person and the company. Recording at least one of them is required. Contacts can be modified later.
Adding contact person
To add a default contact person to the card, fill out the fields under the Contact Person caption [1.3.]. Entering First and Last Name is required, but Position, Email and Phone are optional.
For more information, see: Managing Client Data
When typing data into the First Name, Last Name, Email or Phone field, the system offers those names that had been previously entered and correspond to the characters entered. By selecting a contact person that already exists in the system, you can add a new card to the client. The selected person will be the default contact person of the card.
Entering company data
Entering Business Name is required, but Website, Email, and Phone are optional [1.5.].
For more information, see: Managing Client Data
When typing data into the Business Name field, the system offers those previously entered companies whose names correspond to the characters entered. By selecting a company that already exists in the system, you can quickly add a new card to a client.
If you create a card to a company that already exists in the system, you can select a default contact person from the Contacts list after selecting the company. You can choose from the company’s contact persons or add a new one by clicking on the +New Contact [1.4.].
The data entered can be modified later in Contacts.
Entering basic data
When adding a new client/card, you can choose a Status [1.6.] for the card. Also, you can select a user (that already exists in the system) who will be the Owner [1.7.] of the card.
For more information, see: Customizing Statuses (Processes), Users, Rights
After filling out the fields, click on the [Add] button [1.8.].
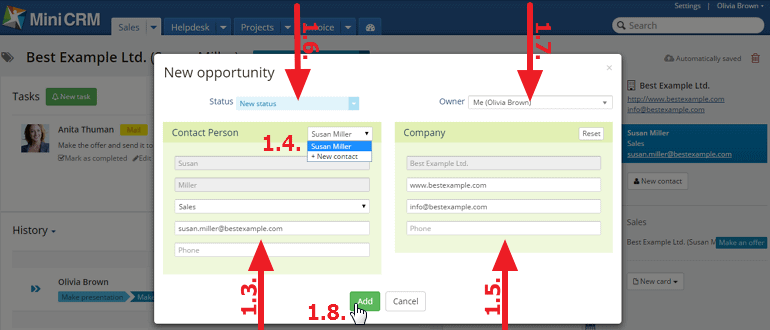
After entering personal details and the card is finished, the default contact person will appear with blue background in Contacts. This can be modified later by clicking on the check mark appearing before the name [1.9.].

For more information, see: Managing Client Data, Structure of Cards, Managing Tasks > Structure of cards > Contacts
Import
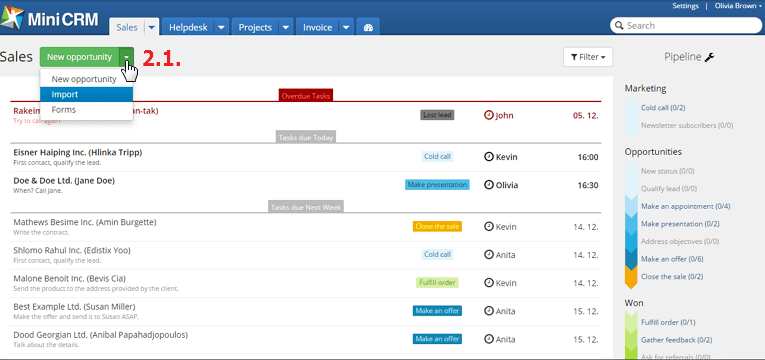
To import your client database from Excel into MiniCRM, click on [New…] > [Import] option [2.1.] in a module.
For more information, see: Import
Adding additional cards
Is possible:
-
by following the instructions in Adding manually
-
by clicking on the [New card] button on a client’s card and selecting an option [3.1.]
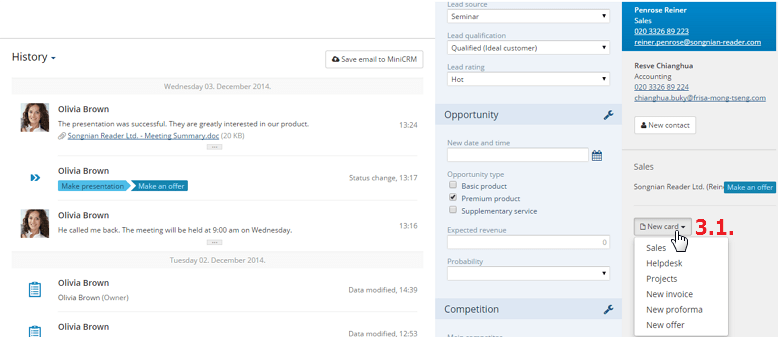
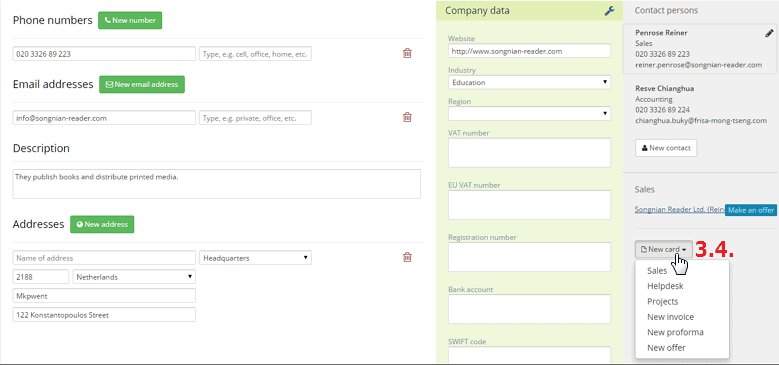
- by searching for a client and clicking on Company or Person [3.2.] > name of the client [3.3.] > [New card] and selecting an option [3.4.].

On cards and contact cards you can only add additional cards to the selected client.
“(Company) data shown in pictures were only created for testing.”