Structure of Cards, Managing Tasks
Listing cards
For more information, see: Listing Cards
Adding new cards
For more information, see: Adding New Clients, Cards
Structure of cards
Cards consist of the following 10 parts:
- Name [1.1.]
- Modification date [1.2.]
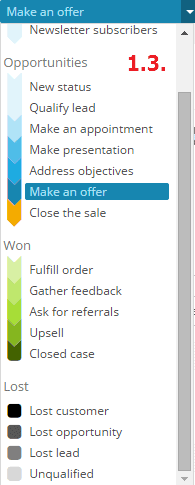
- Status [1.3.]
- Owner [1.4.]
- Tasks [1.5.]
- History [1.6.]
- Contacts [1.7.]
- Cards [1.8.]
- Fields [1.9.]
Name [1.1.]
By default it consists of the following parts:
- Company with contact person: Business name + default contact person’s name
- Company without contact person: Business name
- Private individuals: Client’s name
To modify a name, click on it, then on the [Save name] button.

Modification date [1.2.]
To see the exact date of last modification and the user’s name who modified it, hover the mouse over the word “Modified…”.
The date is updated automatically if you:
- rewrite the card’s name
- change the status/owner
- modify a field value
- move the card to Trash

Status [1.3.]
To change the current status of the card, click on the arrow next to the field and choose a new one from the list.
For more information, see: Customizing Statuses (processes)
Owner [1.4.]
It is possible to assign, even automatically, an Owner to the card.
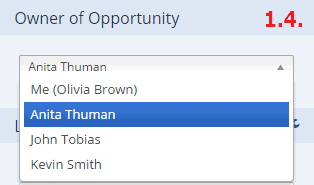
Depending on their rights, some users only have access to their own cards, but some have access to other users’ cards as well. Those cards that are not assigned to any users can be accessed by anyone.
For more information, see: Users, Rights
Tasks [1.5.]
You have to accomplish these tasks by deadline. It is recommended to add tasks only if they could be accomplished within a short time.
For more information, see: Managing tasks

If you are using an Incoming email manager, you can compose a Reply on a card which will be sent to the client as an email message. To compose, click on [New task] > Reply. The Recipient is always the default contact person of the card but it is possible to add more recipients (e.g. additional contact persons, active users or the company).
Type the reply into the text box. To load a Template, click on the arrow next to [Send], then on Insert template. To discard the message, click on [Send] > Discard. To send the message, click on [Send].
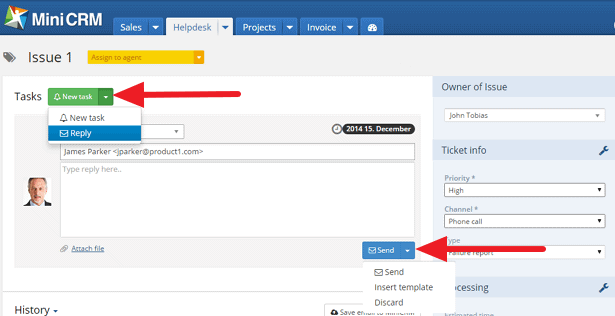
The Sender is always the central sender of the selected module.
The Subject consists of the name and the unique ID of the relevant card. If the Incoming email manager is set, the module’s central email address will be redirected to the Incoming email manager’s address. In that case, the system automatically saves the clients’ reply in History of the relevant card. It happens based on the ID in the Subject.
History [1.6.]
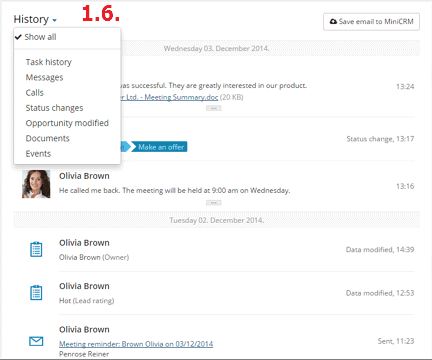
Here you can see the:
- Tasks already completed
- Status changes
- Modifications in the name of the owner/card/field values
- Email and SMS sendouts
- archive Email messages
- File uploads via file fields
- Lead source
The relevant user’s name is always shown by every single entry. If the system performed the task, MiniCRM is shown. For example, subscribing via forms, data modification by link and API, automated or mass email sending and SMS sendouts, and archiving emails.
To filter the entries, click on the arrow next to History and choose an item.
Contacts [1.7.]
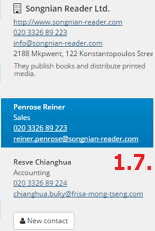
You can add and modify data through contact cards and forms. To access the contact card, click on the name of a company/person. To access the form, click on the name of the contact person.
If you click on an Email address, you can send a message. If you click on a Phone number, you can make a call.
The default contact person of the card appears with blue background. You can add or modify this person by hovering the mouse over the selected person’s name and clicking on the check mark.
For more information, see: Managing Client Data
Cards [1.8.]
Under Contacts, all cards belonging to the client are listed by modules. You can also see their statuses.
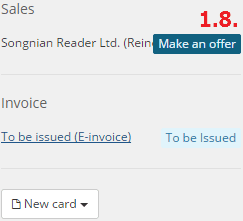
By clicking on the [New card] button, you can add a new card to your client within the selected module.
Fields [1.9.]
In Fields you can store important information that can be used to create reports, statistics, and segment/group cards and clients.
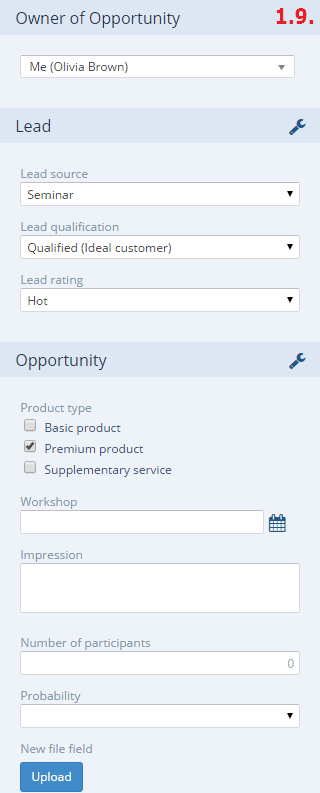
For more information, see: Customizing Fields
Managing tasks

To add a new task, click on the [New task] [2.1.] button on the selected card.
Task assignee
Choose a Task assignee from the active users in the system. By default, you are the Task assignee.
Task’s details
Type the task’s details into the text box.
Deadline
You can choose a pre-selected deadline or enter a specific date and time. If you click on the date, you can modify the deadline without editing the task.
Select the date on the popup calendar, and click on [OK]. To modify it later, click on the calendar icon.
If the deadline expires, the name of the relevant card is highlighted on the list of cards. This way you can always see the daily tasks.
Task type, duration, and notification
You can add a task without type or you can choose from the following ones:
- Phone
- Phone (failed)
- Meeting
It is possible to customize them by modules.
You can also set a default duration and notification time for every type. The task’s duration and notification can be seen on synchronized calendars.
Attach file [2.2.]
To attach documents, click on the Attach file icon and choose a file from your computer.
Uploaded documents are available in open tasks and history. To delete an attachment, click on the Trash icon next to it.
Adding tasks [2.3.]
If you have performed the settings, click on [Save].
Editing tasks [2.4.]
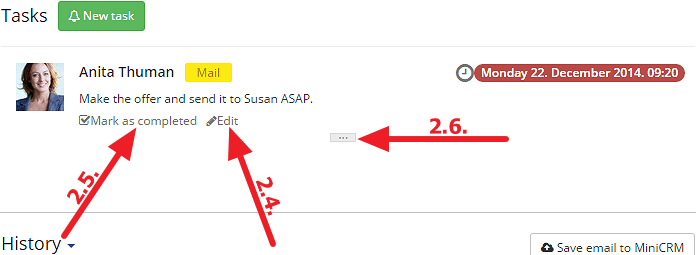
To edit a saved task, click on Edit.
You can edit more tasks simultaneously. You can still edit and mark tasks as completed if there is an empty required field on the card. While editing a task, you can make changes on the card as well.
Users - depending on their rights - can modify each other’s tasks as well.
Completing tasks [2.5.]
Once you complete a task, you will have to close it. To close a task, click on Mark as completed. After that, it will be seen in History.
Keep in mind that you can’t modify tasks that were marked as completed.
View task history and modifications [2.6.]
If you click on the dots, you will see the task history (information regarding creation and modification).
Taking over tasks
In MiniCRM, employees can get tasks automatically, create for themselves or - depending on their rights - assign new tasks to their co-workers.
If a task was not completed by the person who had created it, the system automatically changes the task assignee after clicking on [Mark as completed] and approving it.
Managing tags
Tags help you to characterize cards and group them by filters.
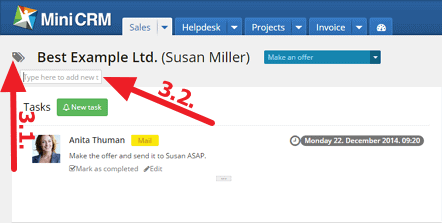
To add a new tag, click on the Tag icon [3.1.] next to the name of the card and name it [3.2.]. If you click outside the field, the tag is added to the client and it can be seen on every card of the client.
For more information, see: Managing Tags in MiniCRM
Related Emails
To every card belongs a unique Email address [4.1.]. To see it, click on the [Save email to MiniCRM] button on a card.
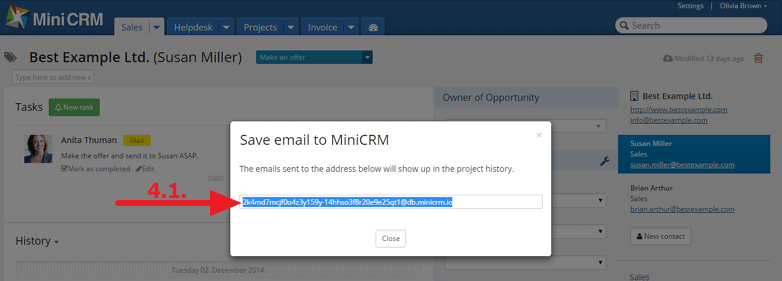
You can archive email messages forwarded to this address, so they can be accessed later in History.
Removing cards
To move a card to trash, click on the Move to Trash [5.1.] icon.

To restore the card, click on its name, then on the Restore [5.2.] icon.
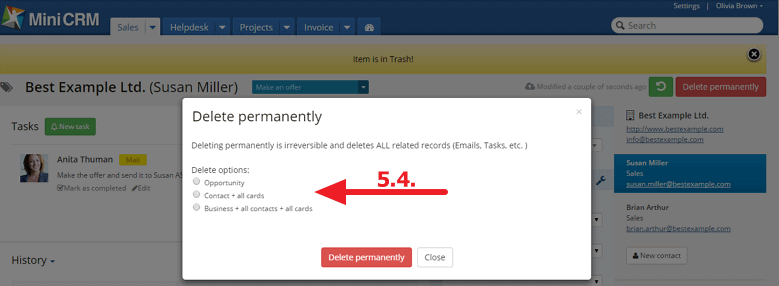
To delete it permanently, click on the [Delete permanently] [5.3.] button.

The system offers the following options from which you can choose [5.4.]:
- Card
- Contact + all cards
- Company + all contacts + all cards
“(Company) data shown in pictures were only created for testing.”