Filters
Targeting, forming target audiences based on the characteristics of clients recorded in MiniCRM.
Filtering in MiniCRM
You can filter by:
- Using statuses [1.1.]
- Using filters [1.2.]
- Selecting an owner [1.3.]
Using statuses [1.1.]
You can narrow down the list of cards by selecting a status.
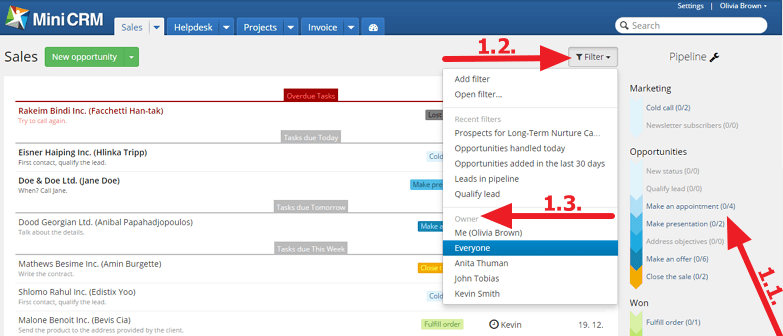
Using filters [1.2.]
If you click on the [Filter] button, you can filter Fields of cards, Contacts, Addresses, Email sendouts and Others (e.g. tags).
Selecting an owner [1.3.]
By clicking on the [Filter] button, you can even select an owner to narrow further down the list of cards.
Adding new filters
To add filters, click on the [Filter] > [Add filter] option [2.1.] within the selected module.
If you create a new filter, the Owner and Status fields are displayed without a value [2.2.].

Filter conditions settings
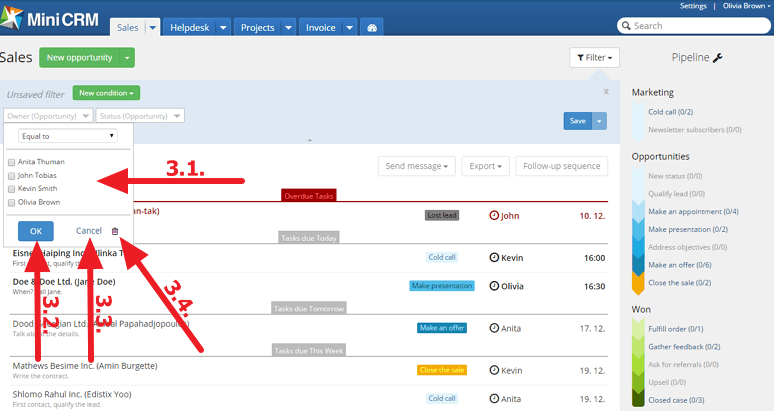
If you click on a field, a dropdown list appears that shows the relations and values depending on the selected field. For example, the Owner field is a dropdown list [3.1.] where the relations are the following: “Equal to”, “Not equal to”, “Is set”, “Is not set”. If you use “Equal to” or “Not equal to”, you can select more values.
- If you use the “Equal to” (or “checked”) relation and select more values, all cards will be listed that are equal to any values. In that case there is an OR relation between the selected values.
- If you use the “Not equal to” (or “not checked”) relation and select more values, only those cards will be listed that are not equal to either values. In that case there is an AND relation between the selected values.
- In case of the “Is set” and “Is not set” options, you don’t have to select a value. Keep in mind that filtering with an empty condition is not equal to the “Is not set” option because empty fields can only be filtered by selecting the “Is not set” option.
If you click on the [OK] button [3.2.], the values set on the field editor will be transferred to the filter. However, if you click on the [Cancel] button [3.3.] or outside the field editor, all changes will be lost. To delete a condition from the filter, click on the Trash icon [3.4.].
The commands are available on keyboards as well:
Enter=OK
Esc=Cancel
Del=Delete
If you click on [OK], the filter process starts immediately, and the list will be updated according to the conditions.
Adding more conditions
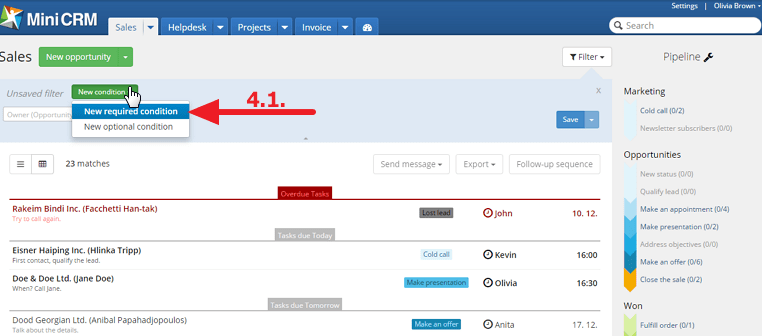
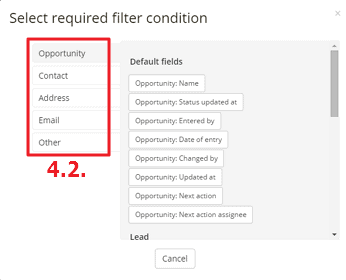
To add fields, click on the [New condition] > [New required condition] option [4.1.] and select one from the list that appears [4.2.]. One field can only be used once, but in case of a Dropdown list, a Checkbox and a Text box, it is possible to add more values. In a Text box you can separate the different values by using a comma or semicolon. In case of Number and Date and Time fields, you can use “Less than” and “Greater than” relations and Interval as well.
Then only those cards appear that meet all conditions.
If you want to display the data of the company’s contact person in Grid view, go to Contact, then add the Contact: Type condition and check the Person option. So in the given columns (e.g. Contact: First name) the data of Contact persons are shown.
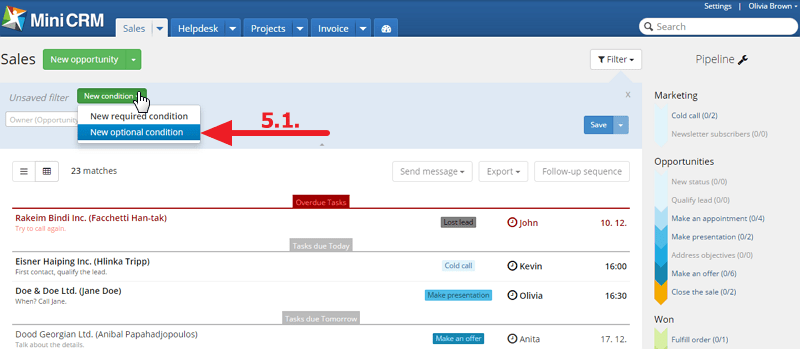
Optional conditions
A card can also be displayed if it meets any conditions. This can be done by clicking on the [New condition] > [New optional condition] option [5.1.]. Firstly, only one optional condition can be added.
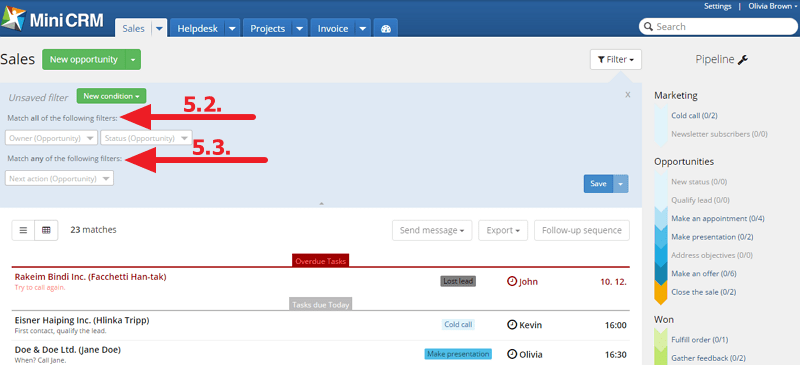
After that, the following two groups of fields will be shown:
- Match all of the following filters [5.2.]
- Match any of the following filters [5.3.]
Fields added to one group can be added once to the other as well.
There is an AND relation between the result of the conditions of “Match all of the following filters” and the result of the conditions of “Match any of the following filters”.
It means that
- if the conditions of “Match all of the following filters” are: A, B, C
- and the conditions of “Match any of the following filters” are: D, E, F,
then the relations between them are the following: A and B and C and (D or E or F).
It is also possible to create a filter by using only optional conditions. In that case it is enough to meet any of these conditions to list a card.
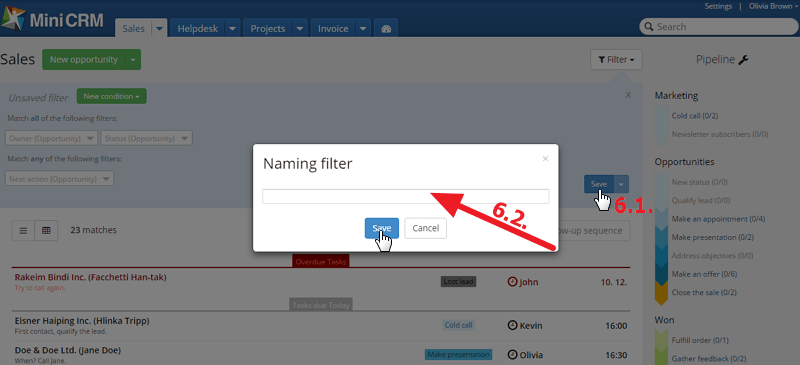
Saving filters
To save a filter, click on [Save] [6.1.] and name it [6.2.].
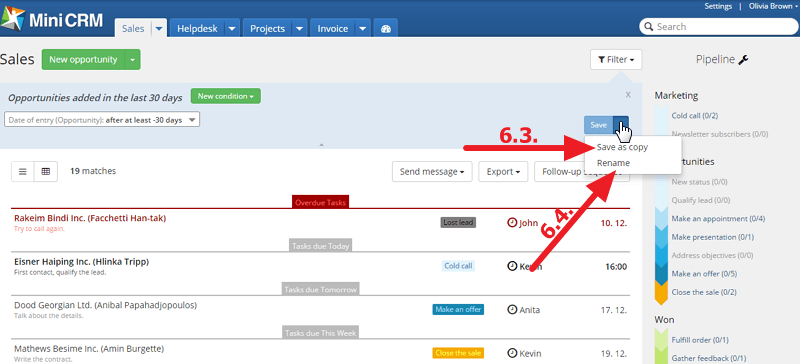
After that, the system automatically saves any further changes. To create a copy of a saved filter, click on the [Save] > [Save as copy] option [6.3.]. The system records it in the same module.
To rename a saved filter, click on the [Save] > [Rename] option [6.4.].
Using saved filters
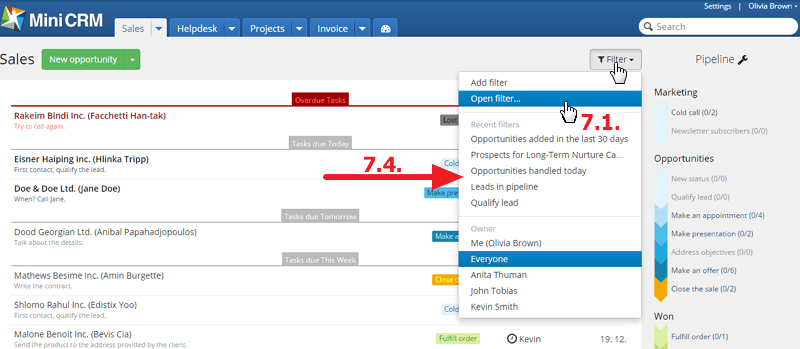
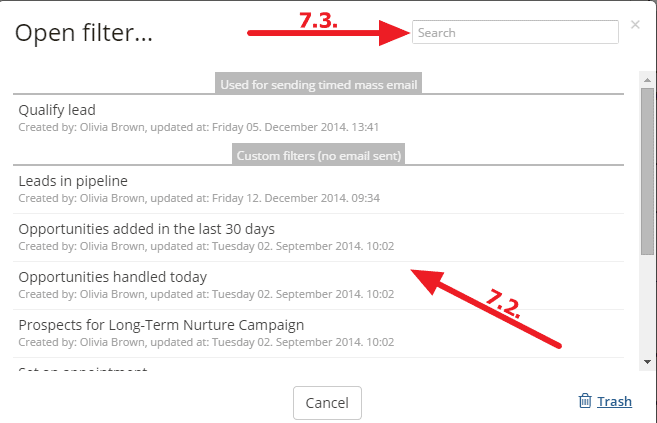
To open a saved filter, click on [Filter] > [Open filter…] [7.1.] and select one from the list [7.2.]. To search among saved filters, type a keyword into the Search field [7.3.]. 5 saved filters that were loaded recently will be available later under [Filter] > Recent filters option [7.4.].
The filter conditions are displayed under the filter’s name [7.5.].
You can perform the following operations regarding the filtered cards:
- Send message [7.6.]: (Email (now), Email (timed), SMS)
- Export [7.7.]: By selecting the Excel option, you can export data to an Excel file. By selecting the Synchronize with Google Spreadsheet option, you can create a spreadsheet in Google Docs that always shows current data about your clients and their cards.
- Follow-up sequence [7.8.]: You can create a follow-up sequence to the current filter.

To minimize the editor window, click on the arrow at the bottom of the blue box. To reset the list, click on the X sign.
Deleting filters
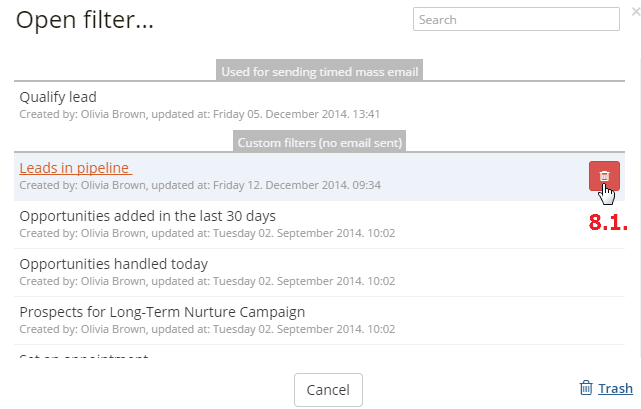
To move a filter to Trash, click on the [Filter] > [Open filter…] button, then on the Trash icon [8.1.]. Deleted filters can only be seen in Trash. They cannot be used to control follow-up sequences and it is also impossible to activate an inactive follow-up sequence connected to them. However, it is possible to use, change and restore them.
Statuses and filters
If you select a status, that value is also displayed on the filter editor in a compact view.
“(Company) data shown in pictures were only created for testing.”