Customizing Fields
Fields
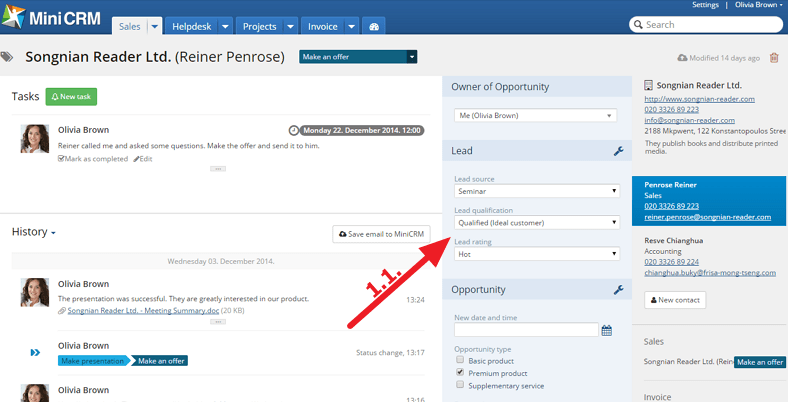
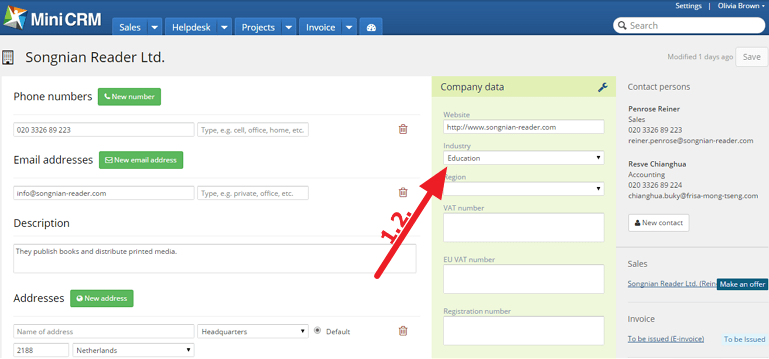
On cards [1.1.] and contact cards [1.2.] you can store data in fields. They have a central role in grouping cards and creating statistics.
You can add as many fields as you want to your CRM system.
Field types
There are 6 types:
Dropdown
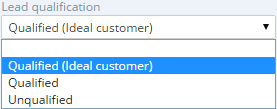
You can only choose one value so you have to enter mutually exclusive values. In Reports you can create statistics based on these fields.
Checkbox
You can check more values. You can add more fields to one card but you can only add 16 values to one field. It is recommended to group these fields and values logically according to the possible answers.

Text box
It cannot be used for statistics and creating lists so it is recommended to use it rarely. Consider whether it can be replaced with a dropdown list or not. If yes, choose that type.

Date and Time
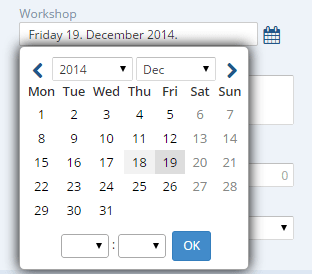
You can choose a date from the calendar or enter a specific date. By default the current date is shown. If you click on the Date field and press the Backspace or Del button, the content of the field will be deleted.
Number field
It can be used for recording numbers but not for recording sum of money.
For example: Square metres of a flat, Number of participants etc.

File field
It can be used for uploading and recording, for example, contracts, or invoices in PDF format. You cannot create File fields on clients’ contact cards.
File fields can be also marked as required and can be inserted into emails as variables (in messages it is replaced with a download link).

Only one file can be uploaded to one field. The upload info (person’s name who uploaded the file, date of upload, file name, link) is shown in History. Uploaded files can be replaced anytime. Changes are also recorded in History.
Creating new fields
Admins can create new groups of fields by clicking on the Wrench icon next to a field on a card/contact card [2.1.].
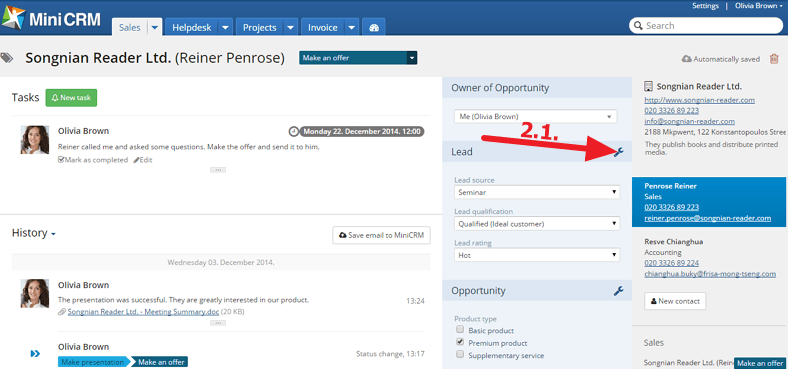
Creating new field groups
By using the drag and drop function you can move the New box to a group on the left side [2.2.].
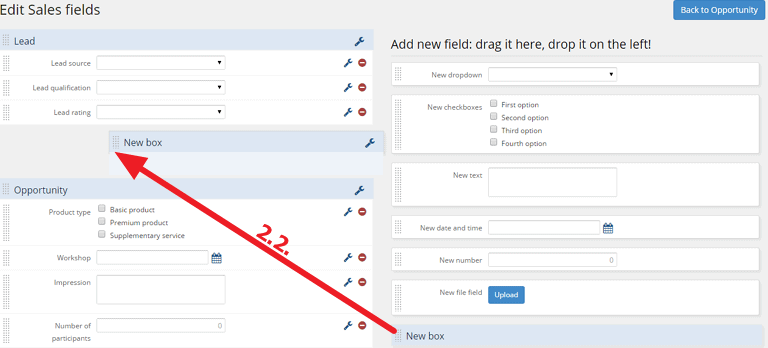
Creating new fields
By using the drag and drop function, move the selected field type to a group on the left side [2.3.].
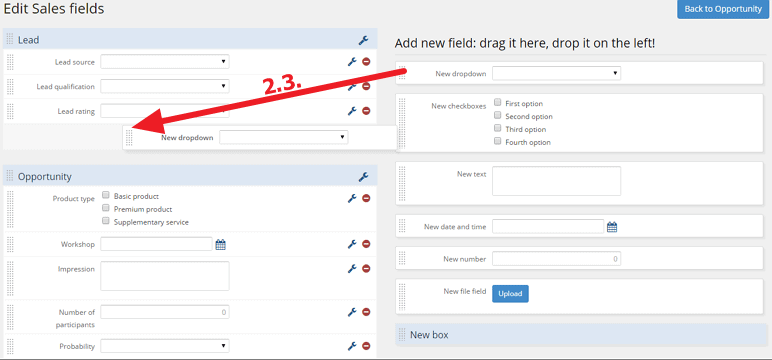
Customizing fields
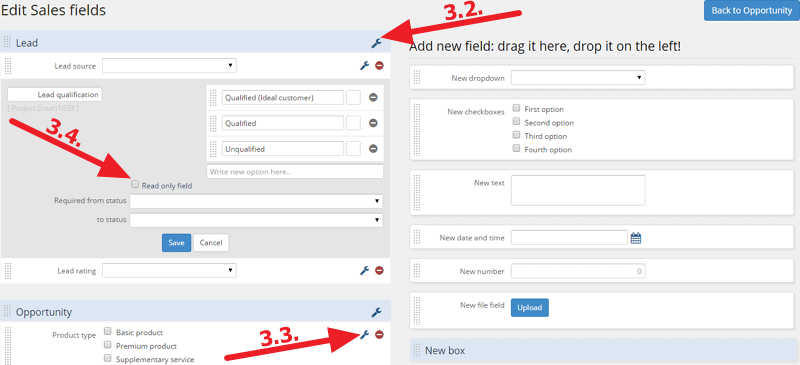
Only admins can change the already existing fields. To do this, click on the Wrench icon [3.1.] next to a field of a card/contact card.
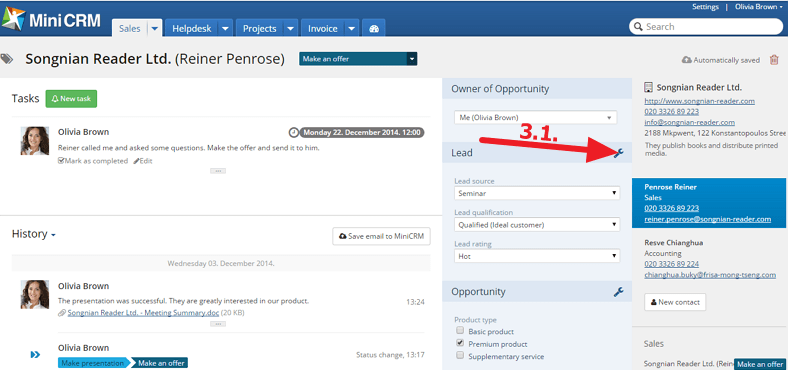
Field groups settings
To rename a group, click on the Edit box icon [3.2.] and enter another name. To change a group’s position, grab the left side of the box and move it upwards or downwards.
Customizing fields
To perform settings, click on the Edit field icon [3.3.].
To make a field read-only (values can be only added to it via forms and links), check the Read only field option [3.4.]. If you don’t check it, you can set from which status to which status it is required to fill out the fields.
To change a field’s or value’s position, grab it and move it upwards or downwards within a group or move it to another group.
Default fields’ names/values cannot be changed or deleted (delete icon is dim) but it is possible to add more default values.
Deleting fields
To delete a field/field group, go to the Edit fields page.
Deleting field groups
To delete a group, click on the Edit box [4.1.] > [Delete] button [4.2.].
Only those groups can be deleted that don’t contain any fields.


Deleting fields
To delete a field, click on the red icon next to it [4.3.].
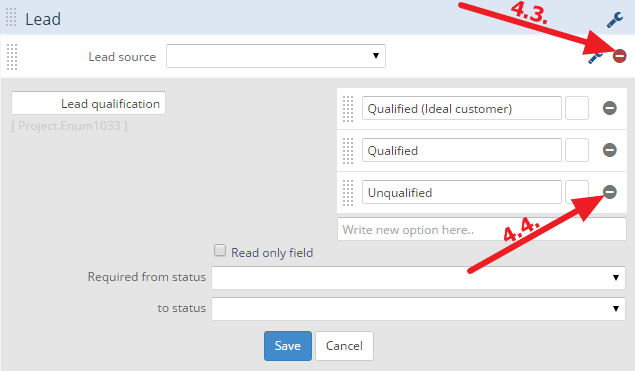
If the field is not used as a condition in any Saved filters, it is deleted immediately. However, if it is used as a condition, you have to delete it from the Saved filter. If the selected field is used on Forms, Cards or on a contact card, it is deleted permanently from all of them. The system requires your approval before deleting.
Default fields (e.g. Region, Invoice No.) cannot be deleted from the system. The delete icon is dim [4.4.] next to these fields.
“(Company) data shown in pictures were only created for testing.”